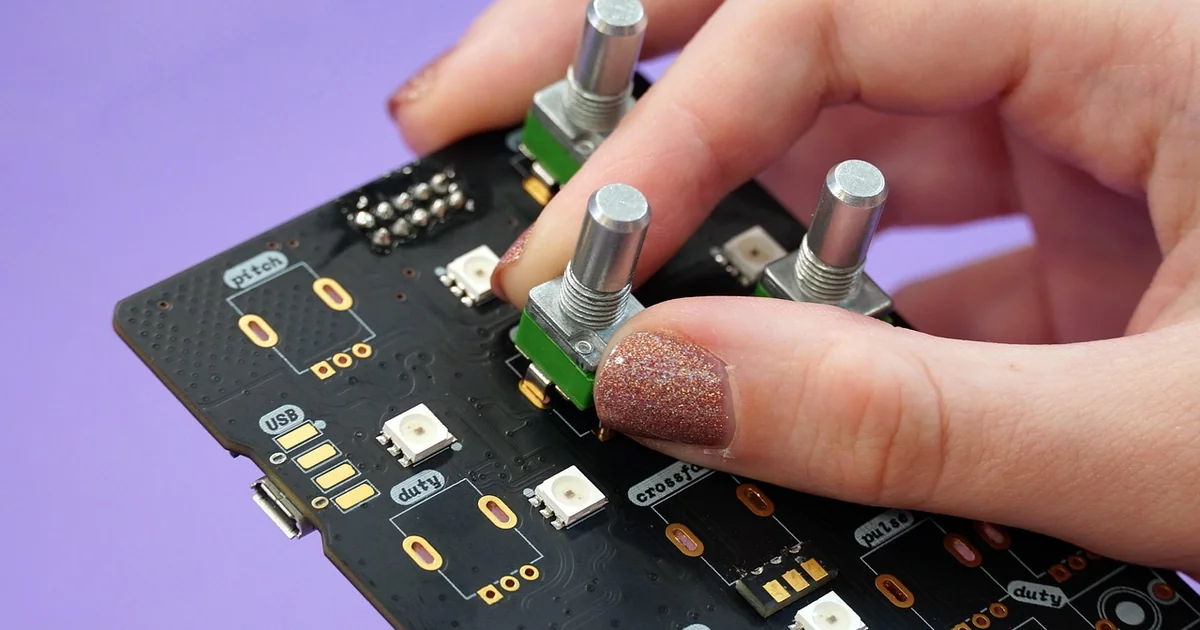
Factory-made circuit boards all look the same. Straight lines. Right angles. Grids. It is efficient, yes, but it lacks soul. One electronics enthusiast decided to break away from that monotony. Elliot Andal of the ALTco YouTube channel set out to prove that a printed circuit board could be functional and beautiful. The result was a hand-inked, home-etched PCB for a 3D-printed fume extractor. This story is about that process. It is about the materials that worked, the ones that failed, and the satisfaction of making something truly unique. If you have ever felt limited by the rigid rules of electronics design, this project might inspire you to pick up a pen and draw your own path.
A Rebellion Against the Straight Line
Mass-produced PCBs follow a predictable pattern. Computer-aided design (CAD) software forces traces into straight lines and 45-degree angles. This works perfectly for automated manufacturing. But for a creative mind, it feels sterile. Elliot Andal voiced this frustration at the start of their video. They wanted curves. They wanted arcs. They wanted a logo on the board itself. The only way to get that was to do it by hand. This decision sparked a journey into the world of hand drawn pcb etching.
The Search for the Perfect Resist
The core challenge of hand drawn pcb etching lies in the resist. A resist is a material that protects copper from the etching solution. You draw your circuit traces with it. Everything else gets eaten away by the chemical bath. Finding the right pen or paint is not trivial. Andal tested a wide range of options. Some markers bled too much. Others did not provide enough coverage. The paint flaked off during the etch. It was a process of elimination.
Why the Pentel Marker Won
After many trials, one tool stood out. The Pentel permanent marker delivered consistent, even coverage. It behaved perfectly as a resist. The ink bonded well to the copper surface. It did not smudge when handled. It did not break down in the ferric chloride bath. For anyone attempting hand drawn pcb etching, this is a critical lesson. Not all markers are equal. You need a solvent-based permanent marker with a fine tip. The Pentel brand, in this case, proved reliable. The evenness of the application directly determines the quality of the final trace. A patchy resist leads to broken connections.
Surface Preparation Matters
Before you even touch the board with a pen, you must clean the copper. Andal experimented with different preparation methods. A dirty or oxidized surface will repel the ink. The solution is simple but essential. Use fine steel wool or a scouring pad. Rub the copper until it shines. Then wipe it down with isopropyl alcohol. Do not touch the cleaned surface with your bare fingers. The oils from your skin can ruin the adhesion. This step takes five minutes. It saves hours of frustration later.
The Etching Chemistry: What Worked and What Did Not
Etching is the chemical process that removes unwanted copper. Only the traces protected by your hand-drawn resist remain. Andal tested several etching solutions. Some are common household items. Others are more specialized. The results were clear.
The Failure of Household Alternatives
Many online tutorials suggest using hydrogen peroxide, vinegar, and salt as an etching solution. It sounds safe and accessible. Andal tried this combination. It did not work well. The etch was slow. It was uneven. It required constant agitation and monitoring. For a simple board, it might be adequate. For a detailed, artistic design with fine curves, it was unreliable. The mixture often left a residue that damaged the resist. The failure rate was high. If you are serious about hand drawn pcb etching, skip the kitchen chemistry.
Why Ferric Chloride Remains the Standard
Ferric chloride is the industry standard for a reason. It etches consistently. It works at room temperature. It produces clean, sharp edges. Andal returned to ferric chloride after the household experiments failed. The results were immediate. The board etched cleanly. The curves and the ALTco logo came out perfectly. The process took about 20 to 30 minutes. You can speed it up by gently warming the solution, but it is not necessary. Ferric chloride is toxic and stains everything it touches. You must handle it with care. Use gloves, safety glasses, and work in a ventilated area. But for quality, it is unmatched.
Step-by-Step: Drawing the Artistic PCB
Once the materials were settled, the real work began. Andal drew the circuit design freehand. This is not a skill you master overnight. It requires patience and a steady hand. Here is how the process unfolded.
Planning the Layout
You cannot just start drawing. You need a mental map of the circuit. Andal knew the fan controller schematic beforehand. They planned the placement of the integrated circuits (ICs) and wires. The curves and arcs were deliberate. The ALTco logo was placed in an empty area of the board. This is the design phase. Use graph paper or a simple sketch. Mark where each component will go. Then pencil in the traces. Keep the paths as direct as possible. Avoid crossing traces. If you must cross, plan for a jumper wire.
Transferring the Design
How do you get the sketch onto the copper board? Andal used a direct drawing method. They placed the board on a stable surface. They used a ruler for straight sections. For curves, they drew freehand. Start with the thickest power traces. These carry current and need more copper. Then add the signal traces. Finish with the logo or decorative elements. If you make a mistake, wipe the ink off with alcohol and start that section again. Do not rush. A single broken trace means the board will not work.
Checking for Continuity
Before the board goes into the etchant, check your work. Use a multimeter in continuity mode. Touch the probes to the beginning and end of each trace. The meter should beep. If it does not, the trace is broken. You can add more ink to bridge the gap. This is your last chance to fix errors. Once the copper is gone, there is no going back.
Etching and Finishing the Board
With the design drawn and verified, it was time for the chemical bath. This step transforms your drawing into a permanent circuit.
You may also enjoy reading: 7 Reasons This Gorgeous Lego Set Brings Disneyland Home.
The Etching Bath
Andal used a shallow plastic container. They poured enough ferric chloride to cover the board. The board floated copper-side down. This allows the dissolved copper to fall away. Agitate the container gently every few minutes. Check the progress every 10 minutes. You will see the exposed copper turn a lighter color. Eventually, only the traces under the ink remain. Once the unwanted copper is gone, remove the board. Rinse it immediately with water. Do not let the ferric chloride dry on the board.
Cleaning and Tinning
After etching, the board looks dull. The resist ink is still on the traces. Remove it with acetone or isopropyl alcohol. The copper underneath will be bright and clean. Andal took an extra step. They tinned the traces with solder. This means applying a thin layer of solder to all the copper paths. It protects the copper from oxidation. It also makes the board look professional. The silver-grey traces contrast beautifully with the green or bare fiberglass substrate. It is a small touch that elevates the entire project.
Assembling the Fume Extractor
The PCB was not an end in itself. It was a component of a larger device. Andal built a 3D-printed filtered fume extractor. This is a common tool in soldering workshops. It pulls solder smoke away from your face and through a filter. The hand-drawn PCB served as the fan controller. It managed the speed of the fan. The design was practical. The enclosure was printed in a bright color. The PCB was mounted visibly, not hidden inside. This was a deliberate choice. Why hide something that looks this good?
Soldering the Components
With the board etched and tinned, Andal soldered the ICs, resistors, and wires. The tinned traces made soldering easier. The solder flowed smoothly onto the pads. The hand-drawn traces did not cause any issues. The circuit worked on the first try. This is a testament to careful planning and execution. If you take your time with the drawing and etching, the assembly is straightforward.
Testing the Finished Product
The video ends with the fume extractor running. The fan spins. The smoke is pulled through the filter. The hand-drawn PCB is on full display. Andal’s voiceover notes that it works “surprisingly well.” That is a humble statement. The truth is that it works exactly as designed. The combination of 3D printing and hand drawn pcb etching created a device that is both functional and personal. It is a piece of art that also removes toxic fumes from the air.
Lessons for the Home Etcher
This project offers several takeaways for anyone interested in DIY circuit boards. The first is that you do not need a CNC machine or a laser printer. You need a pen, a board, and some etchant. The second is that failure is part of the process. Andal tested multiple markers and etching solutions. Most did not work. That is how you learn. The third lesson is about safety. Ferric chloride is dangerous. Household alternatives are safer but less reliable. You must decide what risk level you accept. A ventilated area, gloves, and eye protection are non-negotiable.
Common Mistakes to Avoid
- Skipping surface cleaning: A dirty board guarantees a failed etch.
- Using the wrong pen: Not all markers are acid-resistant. Test yours on a scrap piece first.
- Rushing the etch: Check the board frequently. Over-etching can undercut your traces.
- Ignoring ventilation: Ferric chloride fumes are corrosive. Work outside or near an open window.
- Forgetting to tin the traces: Bare copper oxidizes quickly. Tinning preserves your work.
Why This Matters Beyond the Hobby
This project is about more than a single fan controller. It is a statement about creativity in technology. Mass production values uniformity. Hand production values individuality. When you draw your own PCB, you reclaim a small piece of the manufacturing process. You are not just assembling parts. You are creating a circuit that has your signature on it. That is a powerful feeling. It is also a practical skill. If you need a custom board for a prototype, you can make it in an afternoon. You do not need to wait for a factory order.
The world of electronics is often seen as cold and mathematical. Projects like this one remind us that it does not have to be. A circuit board can have curves. It can have a logo. It can be beautiful. The next time you build a project, consider drawing your own PCB. You might be surprised at what you can create with a steady hand and a bottle of ferric chloride.