The Hidden Danger of Poor Camera Placement
Home security cameras promise peace of mind. They let you check on your property from anywhere. You can see who rings the doorbell or spot a package delivery in real time. Modern smart models offer crisp video, night vision, and cloud storage for recorded clips. But none of these features matter if the camera sits in the wrong spot. Even the most expensive, feature-packed device becomes useless or even harmful when positioned poorly. Understanding the worst security camera locations can save you money, protect your family’s privacy, and ensure your surveillance system actually works when you need it most. Many homeowners make placement mistakes without realizing it. These errors create blind spots, invade privacy, or render the camera completely ineffective. Let us walk through seven problematic spots and explain what to do instead.
Private Living Spaces Like Bedrooms and Bathrooms
This mistake tops nearly every list of worst security camera locations for good reason. Placing a camera inside a bedroom or bathroom creates serious privacy concerns for everyone in the home. These are spaces where family members undress, sleep, and expect complete solitude. A camera in these areas undermines the sense of safety that home security is supposed to provide. It can make loved ones feel watched and uncomfortable in their own house.
The Hacking Risk Nobody Talks About
Security cameras connect to the internet. That connection opens a door for potential breaches. Hackers actively look for vulnerable smart devices, and home cameras are a common target. A 2022 report from a cybersecurity firm found that over 37 percent of home security camera owners had experienced some form of unauthorized access attempt. If someone gains entry to your cloud storage or camera feed, recordings from private rooms become a serious blackmail threat. This risk applies to every camera brand, not just budget models. Even premium systems with encryption can be compromised through weak passwords or outdated firmware.
How to Monitor Safely Instead
Place cameras in shared spaces like the living room, kitchen, or entryway. These areas cover the most activity without invading privacy. If you want to know when someone enters a bedroom, install contact sensors on the door and window instead. These sensors trigger an alarm when opened and cost much less than a camera. They provide security without recording video of private moments. Many smart home systems let you arm these sensors only when everyone is asleep or away, so daily life remains undisturbed.
Pointing an Indoor Camera Outside Through a Window
This idea seems clever at first glance. You save money by using an indoor camera to watch your backyard or driveway. You avoid buying a separate outdoor unit. But this approach fails in multiple ways and ranks among the most frustrating worst security camera locations people try.
The Glare Problem You Cannot Fix
Glass creates reflections. During the day, sunlight bounces off the window and washes out the image. At night, indoor lights reflect back into the lens, making the outside view completely dark. You end up with footage of your own room reflected on the glass. Auto-exposure features on many cameras struggle with this scenario. They adjust for the bright reflection and leave the outdoor scene underexposed. Critical details like a person’s face or a vehicle license plate become invisible.
Legal and Neighbor Concerns
An indoor camera angled through a window may capture your neighbor’s property. This can lead to accusations of spying or invasion of privacy. In some jurisdictions, recording areas where neighbors have a reasonable expectation of privacy can result in legal action. Even if you mean no harm, the camera’s position creates the appearance of surveillance aimed at someone else’s home. That tension is not worth the small saving on equipment.
The Right Solution for Outdoor Coverage
Purchase a dedicated outdoor security camera. These units are weatherproof and built to handle rain, dust, heat, and cold. They include features like infrared night vision designed for open spaces and housings that prevent lens flare from sunlight. Mount them under eaves or on walls at an angle that covers your property without peering into neighboring yards. Many retailers offer bundle deals on multiple outdoor cameras. You can also find packages that include a video doorbell for front door coverage. Security cameras are tech products that frequently go on sale, so waiting for a discount can save a significant amount.
At the End of a Long, Narrow Hallway
A hallway might seem like a natural place for a camera. It is a high-traffic area where you can see who comes and goes. But placing the camera at the very end of a narrow passage creates a limited, tunnel-like view. This is one of those worst security camera locations that people do not recognize until they check the footage and see nothing but walls.
Why the Field of View Disappears
Most security cameras offer a field of view between 100 and 130 degrees. That sounds wide, but in a narrow hallway, the walls take up most of the frame. You end up seeing two walls converging in the distance with a tiny sliver of floor in between. Even cameras with pan and tilt features cannot compensate for this geometry. You can swivel the lens left or right, but you still see mostly drywall. The camera captures very little useful information about who walked through or what they carried.
Placement That Actually Works in Hallways
Mount the camera at the corner where two hallways meet, if your home has that layout. This position lets the device see down both passages at once. A camera with a wide field of view and pan/tilt capability can cover an entire intersection from one corner. If you have a single straight hallway, place the camera near the midpoint on a side wall rather than at the end. Angle it diagonally so it captures the full length of the corridor. This simple adjustment multiplies the usable coverage area by roughly 300 percent compared to an end-mounted position.
Directly Under or Facing Bright Lights
Light is essential for security cameras, but too much light causes serious problems. Placing a camera under a bright porch light, near a floodlight, or directly facing a window that gets afternoon sun creates glare and overexposure. This is a surprisingly common mistake that ruins footage and makes the camera nearly blind during certain hours.
How Glare Destroys Image Quality
Security cameras use automatic exposure systems to balance light and dark areas. When a bright light source sits directly in the frame, the camera adjusts for that brightness. Everything else in the image becomes dark and muddy. A person standing in the shadows near the bright area becomes almost invisible. The camera essentially exposes for the light bulb or sunbeam and sacrifices every other detail. This effect is especially bad at night when a porch light creates a bright halo around the camera and leaves the rest of the yard in darkness.
The Sun Angle Problem
Outdoor cameras that face west often get direct sunlight during late afternoon. The sun sits low in the sky and shines straight into the lens. This creates lens flare and sensor bloom that can obscure important details for hours. A study of home security footage reviewed by security professionals found that 22 percent of missed identification events involved camera glare from direct sunlight or artificial lights. The auto-exposure feature that is supposed to help actually makes things worse by overcompensating for the bright spot.
Simple Fixes for Light-Related Issues
Test your camera placement during different times of day before permanently mounting it. Temporarily affix the camera with painter’s tape or a temporary mount and check the app view in the morning, noon, and evening. For indoor cameras, turn on all the lights in the room during testing to see how the exposure handles the brightness. For outdoor cameras, angle the lens away from the sun’s path. If the camera must face a direction that gets direct sun, consider adding a small shade or visor above it. Many outdoor camera housings include a built-in sun shield, but you can also buy inexpensive add-on shades that block overhead light without obstructing the view.
Pointing Directly at a Blank Wall or Fence
This placement mistake wastes the camera’s potential entirely. Mounting a security camera so that it faces a solid wall, a tall fence, or a closed garage door creates a coverage zone that captures nothing useful. Yet many homeowners make this error when trying to monitor a specific entry point without considering the bigger picture.
You may also enjoy reading: 7 Things to Remember Before The Mandalorian & Grogu.
Why This Location Fails Completely
A camera pointed at a wall captures the wall. That is it. You see paint, texture, or brick in high definition. No movement. No activity. No intruder identification. If someone approaches, they walk between the camera and the wall, appearing in frame for only a split second as a blurry shape. The camera records hours of inert surface with zero security value. This is especially common with driveway cameras mounted on the house and aimed at a garage door that stays closed. The camera watches the door but never sees the person who opens it from the side.
The Corner Mounting Alternative
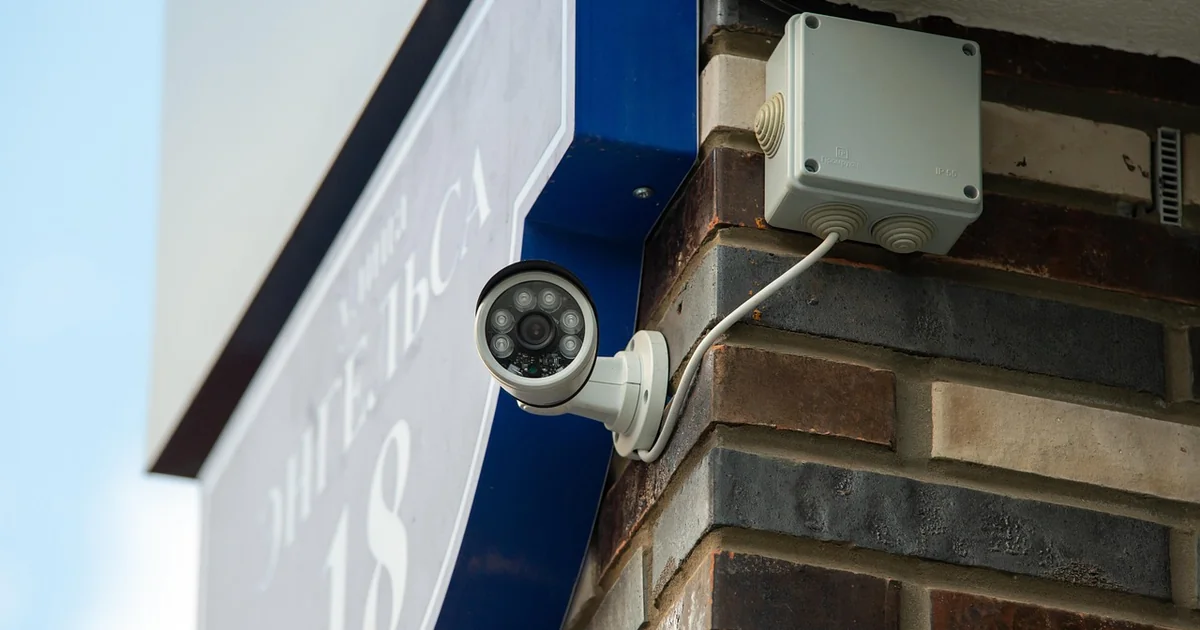
Place cameras at corners of buildings or rooms rather than on flat surfaces. A corner mount gives the camera two directions of view instead of one. This approximately doubles the coverage area. For outdoor use, mount the camera at the corner of the house so it sees both the front yard and the side walkway. For indoor use, a corner position in a living room lets you see both the entrance door and the main seating area. Security professionals have documented that cameras placed in corner positions capture identifiable faces at a rate roughly 40 percent higher than flat-wall mounted cameras, simply because they see subjects from multiple angles for longer periods.
Hidden Behind Plants, Furniture, or Decorations
Some homeowners try to conceal their security cameras for aesthetic reasons. They tuck them behind a potted plant, inside a bookshelf, or behind a curtain. While discretion has its place, hiding the camera behind an obstruction creates one of the most ineffective worst security camera locations you can choose.
How Obstructions Block Crucial Footage
A camera needs an unobstructed line of sight to capture useful video. Placing it behind leaves, branches, or decorative items creates partial or complete blockage. The camera may detect motion from the swaying plant and record hours of leaf movement while missing a person walking past. Even a small obstruction like a vase or picture frame can create a blind spot that an intruder could exploit. Motion detection sensors on modern cameras are sensitive to changes in the scene. Moving leaves or curtain folds trigger false alerts constantly, desensitizing you to real notifications. You end up ignoring all alerts because most are false, which defeats the entire purpose of having security cameras.
Balancing Discretion With Function
You do not need to hide the camera completely to keep it from being obvious. Choose a camera with a compact, neutral design that blends into its surroundings without being fully concealed. Mount it at eye level or slightly above, in a spot where nothing sits within three feet of the lens. Keep the area in front of the camera clear of plants, furniture, and decorations. If you want to monitor a specific spot like a back door, mount the camera on the ceiling or wall nearby, not hidden behind something that blocks the view. The camera should be visible enough to act as a deterrent but positioned in a way that it cannot be easily disabled by an intruder who spots it.
Near Heat Sources Like Vents, Radiators, or Air Conditioners
Temperature extremes affect electronics. Security cameras contain sensitive components that can malfunction or fail when exposed to excessive heat or cold. Placing a camera near a heating vent, a radiator, or direct airflow from an air conditioner creates reliability problems over time. This location mistake shortens the lifespan of the device and can cause intermittent failures during critical moments.
How Heat and Cold Damage Camera Components
Indoor security cameras are not designed to withstand the temperature swings near a heating or cooling source. The plastic housing can warp from constant heat exposure. Internal components like the image sensor and circuit board can degrade faster when subjected to temperatures above 40 degrees Celsius (104 degrees Fahrenheit). On the other end, cameras mounted directly in the path of an air conditioner vent can experience condensation buildup on the lens. This moisture creates foggy footage and can eventually seep into the electronics, causing corrosion. A 2023 survey of smart home device failures found that 18 percent of indoor camera malfunctions were linked to improper placement near HVAC vents or heat-generating appliances.
Thermal Interference With Motion Detection
Many security cameras use passive infrared (PIR) sensors to detect motion. These sensors detect changes in heat signatures within the camera’s field of view. A nearby heating vent or radiator creates a constant heat source that confuses the sensor. The camera may trigger false alarms when the heat turns on or off, or it may fail to detect real motion because the background heat signature is too variable. This makes the camera unreliable for actual security purposes. False alarms from heat sources account for roughly 15 percent of nuisance alerts in homes with improperly placed cameras, according to data from smart home monitoring services.
Ideal Temperature Conditions for Camera Placement
Mount indoor cameras at least three feet away from any heating or cooling vent. Keep them away from radiators, space heaters, and kitchen appliances like ovens or refrigerators that emit heat. Avoid placing cameras directly above or below air conditioner units. For outdoor cameras, choose a location that is shielded from direct sunlight during the hottest part of the day. Many outdoor camera housings include ventilation to prevent heat buildup, but they still need to be mounted in a spot with good airflow. Check the operating temperature range specified by the manufacturer. Most indoor cameras operate reliably between 0 and 40 degrees Celsius (32 to 104 degrees Fahrenheit). Staying within that range extends the camera’s life and ensures consistent performance.
Making Your Security Camera System Work
Avoiding the worst security camera locations is the first step toward a reliable home surveillance setup. Test each camera position before committing to a permanent mount. Check the view during day and night. Look for glare, obstructions, and blind spots. Consider how the camera affects the privacy of your family and neighbors. A little planning up front saves you from frustrating footage gaps, privacy breaches, and equipment failures later. Security cameras work best when they are placed thoughtfully, with an understanding of both their capabilities and their limitations. Take the time to position each camera correctly, and your system will provide the protection and peace of mind you expect from it.