It’s safe to say that I didn’t know better when I bought my first NAS. Like most people diving into network-attached storage for the first time, I grabbed a set of dedicated NAS drives because that’s what the manuals, forums, and product descriptions all pointed toward. Those drives are engineered for 24/7 operation, vibration-tolerant multi-bay environments, and extended reliability. For a newcomer, choosing anything else felt reckless. But over the past three years, as my storage needs exploded and hard drive prices climbed into the stratosphere thanks to the AI boom, I discovered a different path. Here is everything I have learned along the way.
What Is Shucking External Hard Drives and Why Do It?
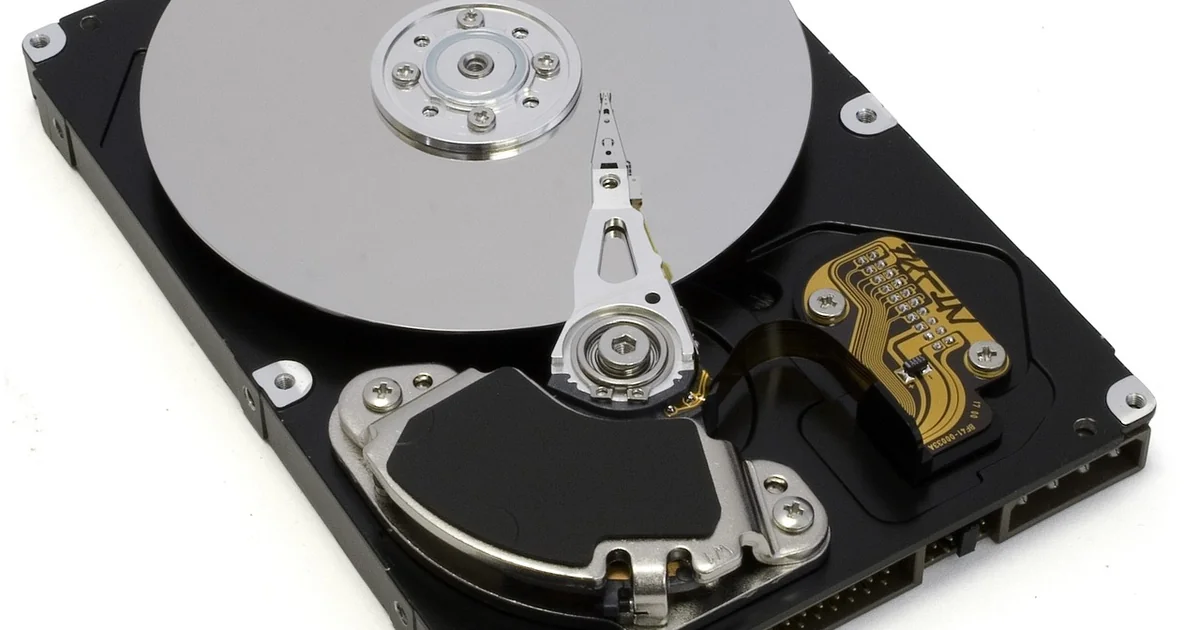
If you have never heard the term before, shucking external hard drives sounds a little absurd at first. The practice is exactly what it sounds like: you buy a retail external hard drive, open its plastic enclosure, remove the internal drive, and install that drive into your NAS or desktop computer. You are essentially buying a finished product only to tear it apart immediately. The process feels ridiculous the first time you do it. You are voluntarily voiding the warranty on a brand-new device. But after you do it once, you quickly realize that the drive inside that external enclosure is often nearly identical to the expensive NAS-rated drive sitting on the shelf next to it.
Why go through the trouble? The answer is simple: money. In 2026, hard drive prices have skyrocketed. What used to cost between $250 and $300 for a large-capacity NAS drive now runs closer to $800. Meanwhile, external hard drives of the same capacity frequently go on sale for a fraction of that price. The gap is so wide that buying multiple external drives and shucking them can effectively pay for an extra drive. In my case, I have expanded my NAS storage by nearly 60 terabytes over three years, all through shucked drives. The savings have been substantial enough to fund an entire additional NAS unit.
The first time you shuck a drive, the experience might feel counterintuitive. You are trading certainty for big savings. But soon you notice that there are not all that many differences between the drive inside the external enclosure and the NAS-branded hard drive you have been buying. Depending on the manufacturer and production batch, the external enclosure may contain a white-label variant or hardware that is extremely closely related to the internal models. Often the only thing you miss out on is the longer five-year warranty that NAS-branded drives offer. For many home users, especially those running RAID configurations with redundancy, that warranty difference is less important than the price.
The Trade-Offs: Warranty, Certainty, and White-Label Drives
Okay, so if it were this easy to save money, why is not everybody doing it? The biggest reason is that shucking comes with real trade-offs. The most obvious one is the warranty. When you open that plastic shell, you almost always void the manufacturer’s warranty on the drive inside. If the drive fails a month later, you have no recourse. That uncertainty scares a lot of people away, and for good reason. A failed drive in a NAS can mean data loss, even with redundancy, if the failure cascades during a rebuild.
White-Label Drives and Variability
Another factor is variability. Not every external drive contains the same high-quality internal model. Some manufacturers use drives that are labeled as “white-label” variants. These are drives that may have slightly different firmware, lower spin speeds, or different error recovery controls compared to retail NAS drives. Some external enclosures even contain SMR (shingled magnetic recording) drives, which are generally not recommended for RAID environments because of poor write performance during rebuilds.
This is where community reports become invaluable. Before I buy any external drive for shucking, I spend time checking model numbers, looking through forums like Reddit and ServeTheHome, and reading what other users have found inside recently purchased enclosures. The hard drive market changes frequently, and one batch may contain a great drive while the next batch switches to an inferior one. Shucking forces you to pay attention. You cannot just trust the brand name on the box. You have to do a little detective work.
Is the Warranty Gap Really That Important?
Let us talk about the five-year warranty on NAS-branded drives. That is a genuine advantage, no question. But here is a reality check: most consumer-grade hard drives, even the expensive ones, are unlikely to fail within the first few years. The bathtub curve of failure rates shows that infant mortality accounts for a small percentage of failures in the first few months. After that, drives typically run reliably for years before their failure rate climbs again near the end of their life. If you are building a home NAS with a proper backup strategy (not just RAID), a shucked drive that fails after three years is not a catastrophe. You replace it. You restore from backup. The money you saved by shucking can more than cover the cost of a replacement.
For me, the trade-off is acceptable. I do not expect every drive to last a decade. I budget for occasional replacements, and the savings from shucking have more than compensated for the few times I have had to swap a failed unit. The key is understanding your own tolerance for risk and your backup setup.
How Shucking Changes Your Hard Drive Buying Process
Once I started shucking drives, I found myself paying much closer attention to what I was actually getting instead of just trusting what was written on the label. My buying process transformed entirely. Before, I would walk into a store, see a hard drive with “NAS” on the label, and buy it. Now, I treat each purchase like a small research project.
Checking Model Numbers and Community Reports
The first thing I do is search for the specific model number of the external drive I am considering. I look for recent posts about what drive people found inside that model. Sometimes the external enclosure contains a drive that is almost identical to a top-tier NAS drive except for firmware. Other times it contains a lower-end drive that I would not want in my NAS. There is no single rule. Different manufacturers behave differently, and even the same manufacturer changes components over time. Keeping up with community reports is essential.
CMR vs. SMR: A Crucial Distinction
One of the most important things I check is whether the drive inside uses CMR (conventional magnetic recording) or SMR (shingled magnetic recording). SMR drives are cheaper to produce but suffer from dramatically reduced write speeds when they need to rewrite data. In a RAID array, an SMR drive can cause rebuild times to skyrocket from hours to days, and in some cases the drive can time out and drop out of the array entirely. I avoid SMR drives for any NAS role that involves writes or rebuilds. For pure media storage (read-only after the initial copy), SMR can be acceptable, but I still prefer CMR whenever possible. I also avoid SMR drives in backup targets where large writes occur regularly.
Not Every Drive in My NAS Is Meant for the Same Task
Another lesson I learned is that not every drive in my NAS needs the same rating. I use a tiered approach. For my media library (movies, TV shows, music), I am comfortable using shucked drives. In the worst-case scenario, even if the drive gives up, I can always recover that library again. It is time-consuming to re-rip discs or re-download files, but the data is replaceable. For my critical backups and irreplaceable family photos, I use higher-rated drives, including some with the full five-year warranty. This hybrid strategy lets me save money where it makes sense while protecting what truly matters.
Over the past three years, I have also noticed that shucking changes how you think about capacity planning. When NAS drives cost $800 each, I was reluctant to fill every bay. I left empty slots for future expansion and often ran my drives close to capacity because adding a new one felt prohibitively expensive. With shucked drives, the cost per terabyte drops significantly. I now fill all my bays immediately and even bought a second expansion unit. The lower cost of entry has allowed me to build a much larger storage pool than I could have justified with retail NAS drives alone.
You may also enjoy reading: 5 Reasons Building Software for Undocumented Citizens Fails.
Practical Steps to Shuck a Drive Safely
If you decide to try shucking external hard drives, the process is straightforward, but it pays to be careful. Here is a practical walkthrough based on my experience.
Choose the Right External Drive
Start by researching which external models are likely to contain the type of drive you want. Large-capacity drives (10TB and above) from major brands like Western Digital and Seagate are common targets. Look for recent community reports. Avoid models known to contain SMR drives or drives with soldered USB interfaces (which cannot be removed). If possible, buy from a retailer with a generous return policy in case the drive inside is not what you expected.
Tools and Preparation
You will need a plastic opening tool or a thin screwdriver, a soft surface, and some patience. Most external enclosures snap together with plastic clips. Gently pry the seam apart, working your way around the enclosure. Some models have hidden screws under labels or rubber feet. Watch teardown videos for your specific model before attempting. Static electricity can damage electronics, so ground yourself by touching a metal object before handling the drive.
Remove the Drive
Once open, you will see the drive connected to a small interface board or directly to the USB port. Carefully disconnect any cables or remove the drive from its mounting. Some enclosures use a proprietary SATA-to-USB adapter that you may want to keep for reuse. Others have the drive permanently attached to the USB bridge. In the latter case, you cannot shuck it for internal use. That is another reason to research beforehand.
Install into Your NAS
After removing the drive, check the label for model number and firmware. Some drives have a 3.3V pin issue on the SATA power connector that may prevent them from spinning up in certain NAS or desktop power supplies. This is easily fixed with a piece of Kapton tape over the third pin. Many modern NAS units no longer have this issue, but it is worth checking community notes for your specific model.
Test Thoroughly
Before trusting a shucked drive with your data, run a full surface scan or bad block test. I use tools like badblocks in Linux or the manufacturer’s own diagnostic software. This step catches any early failures. It takes time, but it is far better to discover a bad drive before it goes into your array than after.
Is Shucking Right for Your NAS?
Shucking is not for everyone. If you are running a business-critical NAS where downtime costs money, the warranty and consistency of retail NAS drives justify the premium. If you have no backup strategy, the risk of a single shucked drive failure could mean total data loss, so stick with drives that come with full support. But for home users, hobbyists, and media enthusiasts who maintain backups, the benefits often far outweigh the drawbacks.
My approach after three years is clear. I buy external drives on sale, check their contents against community reports, and reserve shucked drives for roles where data is replaceable. For my critical data, I still use a few high-end NAS drives for peace of mind. But the majority of my storage now comes from shucked drives, and the total savings across my setup easily exceeds four figures. The technology inside those external enclosures is often the same as the expensive internal versions. You are simply skipping the middleman’s markup and the pretty box.
The hard drive market will continue to fluctuate. Prices may drop again someday, or they may keep rising. Either way, knowing how to evaluate and use shucked drives gives you more control over your storage budget. It changes your buying process from passive acceptance to active research. And in a world where our digital libraries keep growing, every dollar saved is one more dollar you can put toward that next drive.